🚿 Upgrade your flush game with precision and style!
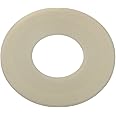
The Roca Dual Flush Valve D1D D2D Diaphragm Washer Seal AH0007100R is a high-quality, 1mm thick rubber sealing washer designed for universal compatibility with both old and new Roca dual flush valves. Lightweight at just 10 grams and available in assorted colors, it ensures a reliable, leak-proof seal that enhances your bathroom’s efficiency and longevity.
| Manufacturer | Roca |
| Part Number | 822403000 |
| Product Dimensions | 18 x 9 x 1 cm; 10 g |
| Item model number | 822403000 |
| Colour | Assorted Color |
| Material | Rubber |
| Thickness | 1 Millimetres |
| Item Package Quantity | 1 |
| Number of Pieces | 1 |
| Measurement System | Metric |
| Included Components | 1 x Roca Dual Flush Valve Base Sealing Washer 822403000 |
| Batteries included? | No |
| Batteries Required? | No |
| Item Weight | 10 g |
M**L
Roca genuine replacement
It was a replacement for the washer. This was a bit more expensive than other suitable ones. Decided to go with this one sold by the manufacturer. Works fine!
I**.
Job done
Purchased to stop a cistern from dripping. Next day, discovered another cistern was also dripping so purchased another. Original order had not yet been dispatched and whilst it was too late to amend original order, the sellers had the sense to merge the orders and dispatch as one. Didn't save anything for me as it was free postage, but at least everything arrived in one delivery. Delivery was quicker than Amazon indicated, couple of days between original order and arrival.I found what part I needed on another website, but postage doubled the cost of an item costing a few £. So free delivery was welcome. I think it was even slightly cheaper when VAT was taken into account.I wasn't exactly sure if this would fix the problem, but for a few £ per cistern it was worth the gamble. I had already identified the original seal as starting to go 'a bit mushy' and whilst I had previously cleaned this off and seal looked good, it still dripped - enough to cause one cistern to refill a couple of times during the night, the other one was less obvious.I swapped out the worse cistern first and getting the old washer off was a bit fiddly. I am sure a proper plumber would know the techniques. Fitting the new one was much simpler as the new washer was quite compliant. It still dripped so I took it off and made sure it was more central as there was some movement. The cistern still dripped so I decided to let it settle in. After a couple of flushes, couple of initial drips then it stops. So job done.A couple of days later, I did the same to the other one. Lesson learned removing old washer but fitting the new was less compliant. Needed a second pair of hands. Warming the new washer in hot water may have made it easier.Long and short, £6 and 20 minutes work fixed two dripping cisterns and no more refilling during the night. The hardest part was identifying the correct make/model flush unit, and for that, I had to look elsewhere and keep my fingers crossed.
R**W
Easy to fit. Solved leaking cistern
Roca Toilet cistern was leaking water continuously into bowl. Followed YouTube video on how to replace the diaphragm (large rubber seal) . Was easy. Problem solved. Old washer had become distorted.
M**S
Make sure you clean the base before reassembling.
The washer was for a Roca dual flush which had a tiny drip inside the tank. I watched a video how to and changed the washer with reasonable ease. Please make sure you clean the outlet base where the washer will sit with a soft cloth.
M**
Work great, saves buying a new unit
Fitting is easy, the nut holing the seal to the unit is not a threaded nut but a quarter turn then pull away, remove old seal, fit new, replace quarter turn nut making sure this lock onto the shaft, great product, great value.
B**Y
Genuine Roca part
Used to repair my Roca Cistern
C**Y
Saved a load of money
My toilet had started dripping into the toilet pan. After research online I decided to try replacing just the washer rather than the whole flush mechanism and certainly tried to avoid a plumber call out fee. It worked! No leak! Feeling smug.
P**P
Reuse Reduce Recycle - Fix limescale stains at the back of the toilet and stop wasting water today
The item is a branded Roca part (I bought the one sold by Amazon as I thought it might arrive faster for 5p more) for my Roca Flush, now a clear silicone rather than a grey rubber washer. I ordered two as both toilets were letting water trickle by into the pan. Both arrived quickly - Thanks Amazon!This is a task that can be carried out by any layperson with the help of YouTube videos and a bit of patience.I watched lots of videos to see how the washer could be removed and thought it was held in place with a plastic nut as there were flattened parts on the 'nut' which I scraped with my spanner, enthusiastically trying, without success to undo.The sleight of hand in the videos I saw could not be replicated (showing it being undone) so I followed the advice on here and removed the old washer with pliers having sat it in boiling water for a minute to make it expand beforehand.The second washer replacement was done the same way as, with the washer off, it still wasn't possible to undo the fixing with the washer off so don't bother trying to undo it - perhaps Roca changed the design? Make sure you brush or scrape the limescale or blu block sediment off the seating in the cistern where it clips back in place before reseating the flush valve unit.To replace the washer I did the same and stretched it over the spindle. Washing up liquid was added to the spindle to allow it to slide smartly into place.To summerise having completed this task twice:Turn water off and flush the toilet to remove all water.Remove buttons and screw. Twist the flush unit anticlockwise to remove, holding near the bottom.Clean all surfaces the rubber washer touches - the seal to see if a replacement is needed (I think you are best off replacing it rather than just cleaning it)Clean where the flush unit detatches from the base because there is limescale here too which can cause it to leak.Unless the fixing holding the washer in doesn't come undone by hand dip it in boiling water and stretch the old washer to remove.Clean spindle with a nail brush (limescale lives here too which can make it leak)Add a little washing up liquid to spindle where new washer goes.Dip new washer in boiling water and stretch over spindle.Replace flush using clockwise twist.Smile and enjoy a nice cup of coffee knowing you've done your bit for the planet!The replacement washer looks like clear silicone rather than rubber and I think it will outlast the original by many years.
Trustpilot
3 weeks ago
2 weeks ago