🔧 Elevate your crimps with pro precision and unbeatable comfort!
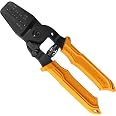
The ENGINEER PA-09 Precision Universal Crimping Tool is a compact, lightweight, and ergonomically designed tool made in Japan. Crafted from high carbon steel with TPR grips, it delivers professional-grade crimps on a variety of mini and micro pins, offering exceptional durability and comfort at a fraction of the cost of vendor-specific tools.


| Manufacturer | ENGINEER |
| Part Number | PA-09 |
| Product Dimensions | 17.5 x 5.7 x 0.25 cm; 135 g |
| Item model number | PA-09 |
| Size | 極小端子用 |
| Colour | Red |
| Style | Single |
| Material | Body: High carbon steel (S55C); Grip: Elastomer |
| Pattern | Single Item |
| Power Source | No |
| Item Package Quantity | 1 |
| Handle material | Thermoplastic Elastomer (TPE) |
| Measurement System | metric |
| Certification | CE |
| Usage | Pro |
| Included Components | ENGINEER PA-09 crimping tool |
| Batteries included? | No |
| Batteries Required? | No |
| Item Weight | 135 g |
S**S
Cry once
I couldn't find anything else at all for crimping microfit connectors, except for the £600 molex tool, and maybe except for the IWISS, which has some pretty mixed reviews and still costs about £20. This is one of the nicer tools i've owned and it should last a long time. The grip is very comfortable and the tension is carefully set. if you do a lot of crimping then this will save you a lot of time and discomfort. PA-09, which is what I bought, can just about crimp 18AWG (I think the wire is 24AWG in the photos), but I would recommend 20AWG or smaller with these. It makes the process a lot more easier, but you still have to actually crimp the wire which is a skill I have not mastered
A**E
Well made, but not without problems.
I have been using this now for a couple of cheers to crimp JST pins onto ribbon cables, I love the JST connectors but I really do not like crimping them.There's a definite "knack" to using this tool, and even having crimped thousands of these, I still find them very fiddly to crimp.The JST crimps have 2 tab sections, one is used to crimp to the insulator ensuring that the cable is held in place, and the second is the actual terminal itself.The method that works for me is:1.) bend the insulator tabs inwards very slightly with needle nosed pliers, if you don't do this, you won't be cable to perform the actual crimp.2) place the crimp into this tool, I rotate the tool in my hand so the legend is facing away, I need to do this is ensure that I'm only crimping the insulator and not the other tabs, I gently close the tool slightly to grab the crimp, then rotate the tool back so the legend is visible, the back of the connector is now facing me.3.) As I'm looking at the rear of the crimp, I insert t he cable into the crimp and look at the other side to make sure that I haven't pushed the cable in too far or not enough, it should be positioned so that the cable insulator is touching the outer tab, and the conductor is touching the inner tabs.4.) very carefully I close the tool to perform the crimp.At this point, you might get a good crimp, or, you might end up with the crimp rotating in the tool jaws, in which case you have to reset everything and try again, the final problem you may get is that the tabs just didn't fold properly, in which case you need to remove the crimp/cut it off/trim the cable and so on.If the crimp was OK, then you repeat the process again, and crimp the inner tabs, just make sure that you check that you are not crushing the end of the crimp, if you do the pin won't be usable.Other issues also include the crimp bending.It works reasonably well most of the time, but sometimes they can be infuriating, especially when the tabs don't fold properly.This is a common issue I've read with this tool, but this is one of the best tools for these crimps, so I kind of just live with these issues.Take your time, and inspect everything before you make the actual crimp.It's also well worth having a multimeter set to "beep" mode, after crimping you should check that the cable is ok, sometimes the cable may more and the conductor might make no or poor contact.
M**Y
Learning curve but works.
The tool definitely works but there is definitely a bit of practice required . Some of mention it is basically a 2 step process to crimp the conductor and insulator lugs - I think if perfected it could be a 1 step .As an alternative to a £350 tool elsewhere it is a sound investment !
S**T
Excellent tool that provides a very high success rate.
Perfect tool for crimping connectors. Well made, pressure is controlled by you not by a ratcheting mechanism - which is what you want. These haven't failed me once.I see some people suggesting you crimp the connectors holding the insulation first then do the wires.Don't do it like that.1) Put the connector with the wire crimps in the centre in a suitable slot eg 1.4mm for JST-XHThe fins for the insulation should be sticking out and shouldn't be in the crimp at this point.2) Insert the wire so that the insulation is just level with the inner part of the outer wings/fins.3) Crimp.4) Pinch the insulation wings/fins slightly to narrow the gap a little - finger pressure is fine at this point.5) Carefully move the wire and crimp to the appropriate slot (1.9mm for JST-XH) with the outer insulation wings/fins in the slot.6) Crimp again.Open the jaws and take out your newly crimped wire. Using this method you can pretty much guarantee success every single time. I've used these for Dupont connectors and JST-XH with great results.If in doubt, watch the video in the listing it's not marketing fluff it shows you exactly what to do.Yes they cost a bit more but they are, honestly, worth it.
Trustpilot
2 months ago
3 weeks ago